Marketing Strategies for Village-Based ISPs

Marketing Strategies for Village-Based ISPs

Getting an ISP business on its feet already faces its challenges, and especially so when it is located in a rural and underdeveloped area. Here at Muft, we have compiled an array of tactics and plans to help you make your ISP business reach farther. Here’s a more detailed elaboration on each strategy:

  1. Local Community Engagement:
    • Actively participate in local events, fairs, and gatherings to establish a visible presence in the community.
    • Sponsor local sports teams, cultural events, or community projects to enhance brand recognition and build trust. This also ties in with word-of-mouth marketing, as it lets people without access to internet know about your business.
    • Engage with local leaders and influencers to gain support and credibility within the community.
  2. Word-of-Mouth Marketing:
    • Implement referral programs that offer incentives, such as discounts or free services, to existing customers who refer new subscribers.
    • Encourage satisfied customers to share their positive experiences through testimonials, both online and offline.
  3. Collaboration with Local Businesses:
    • Forge partnerships with local businesses to provide bundled services, creating mutually beneficial promotions or discounts for shared customers.
    • Tap into existing local business networks to expand your reach and enhance the value proposition for customers.
  4. Educational Workshops:
    • Host workshops on topics like basic internet skills, online safety, and the advantages of high-speed internet to empower the community.
    • Position the ISP as an educational resource, fostering a positive image and increasing community engagement.
  5. Local Language Advertising:
    • Craft marketing materials in the local language to resonate more effectively with the target audience.
    • Use culturally relevant imagery and messaging to ensure that the advertising aligns with the values and preferences of the community.
  6. Door-to-Door Campaigns:
    • Train a team to conduct personalized door-to-door visits, addressing concerns, and explaining the benefits of the ISP’s services.
    • Gather feedback from potential customers to understand their specific needs and tailor offerings accordingly.
  7. Local Cable TV and Radio Ads:
    • Utilize local cable TV networks and radio stations to reach a broad audience, taking advantage of traditional media in areas where these channels remain popular.
    • Design ads that highlight the local relevance of the ISP’s services and their positive impact on the community.
  8. Social Media Presence:
    • Establish and maintain an active presence on popular social media platforms in the area, sharing relevant content and engaging with the community.
    • Use social media to address customer inquiries, showcase local events, and highlight the positive contributions of the ISP to the community.

By combining these strategies, village-based ISPs can create a comprehensive marketing approach that aligns with the specific needs and characteristics of their target audience.

Opening: Trainee Micro ISP (Internet Service Provider) Setup and Management

Opening: Trainee Micro ISP (Internet Service Provider) Setup and Management

Location: North East India

Job Type:
Full-time

About Us:

Muft Internet is India’s fastest-growing rural broadband provider, dedicated to bridging the digital divide in rural areas by empowering individuals to set up and manage their own internet services. We are seeking a candidate who is passionate about IT, learning new things and eager to contribute to our mission – connecting every village in India with world class Internet access.

Job Description:

We are looking for an entry-level Trainee to join our team and learn the ropes of setting up, deploying, and managing a micro Internet Service Provider (ISP) company. This position offers an exciting opportunity to gain hands-on experience in the telecommunications industry and make a meaningful impact in rural communities.

Responsibilities:

– Learn and understand the fundamentals of ISP setup and management under the guidance of experienced professionals.
– Assist in the deployment and maintenance of networking infrastructure for micro ISPs.
– Participate in training programs to develop technical skills related to ISP operations.
– Collaborate with team members to support the expansion of internet services in rural areas.
– Contribute ideas and creativity to improve processes and services.

Requirements:

– Basic computer skills and familiarity with internet usage.
– Eagerness to learn and grow in a dynamic and fast-paced environment.
– Ability to work flexible hours and adapt to changing priorities.
– Strong communication skills and a collaborative mindset.
– A passion for technology and a desire to make a positive impact in underserved communities.

Benefits:

– Competitive salary and benefits package.
– Opportunity for career growth and development.
– Exposure to cutting-edge technologies in the ISP industry.
– Chance to be part of a mission-driven company with a strong focus on social impact.

How to Apply:

If you are excited about the prospect of joining Muft Internet and are ready to take on this challenge, please submit your resume and a cover letter outlining your interest in the position and why you would be a great fit for our team.

How To Join Two Fiber Cables?

How To Join Two Fiber Cables?

[youtube https://www.youtube.com/watch?v=rsXDaDTnR_0&w=560&h=315]

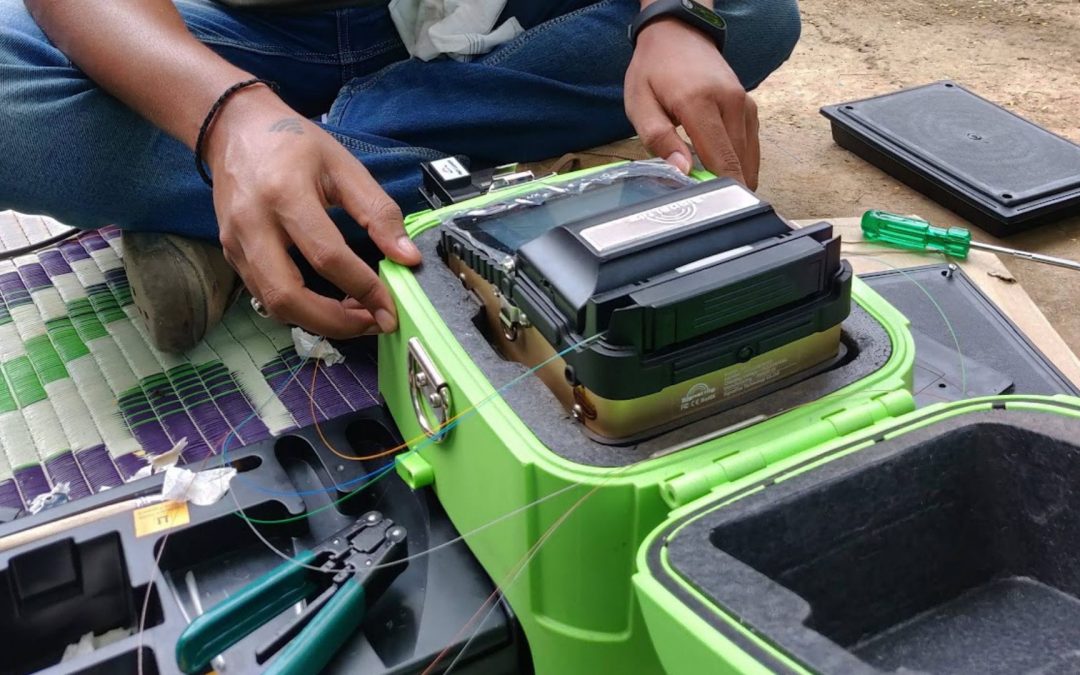
In this video we show you how to join two fiber cables. We have also but a written guide below.

Guide: How to Join Two Fiber Cables

Materials Needed:

  • Two fiber optic cables
  • Fiber optic connectors (matching cable types)
  • Fiber optic cleaver or precision fiber cutter
  • Fiber optic stripper or precision wire stripper
  • Fiber optic polishing film or pre-polished connectors
  • Fiber optic cleaning wipes or lint-free cloth

Steps:

  1. Preparation:
    • Ensure both fiber cables are clean and free from dust or debris. Use fiber optic cleaning wipes or a lint-free cloth to gently clean the cable ends.
    • Verify that the fiber cables have compatible connector types (e.g., SC-to-SC, LC-to-LC) to ensure a proper fit.
  2. Stripping the Fiber Cables:
    • Use a fiber optic stripper or precision wire stripper to carefully remove the outer jacket from each fiber cable. Take care not to damage the fibers inside.
    • Strip the protective buffer coating from each fiber, revealing the bare glass core and cladding. Avoid any nicks or scratches during this process.
  3. Cleaving the Fibers:
    • Utilize a fiber optic cleaver or precision fiber cutter to make a clean, perpendicular cut at the end of each fiber. A precise cleave is essential for a low-loss connection.
  4. Polishing (for Regular Connectors):
    • If you are using regular connectors (not pre-polished connectors), polishing the fiber ends is necessary for better light transmission.
    • Follow the connector manufacturer’s instructions for polishing. Typically, a polishing film is used to achieve a smooth and even finish on the fiber ends.
  5. Pre-Polished Connectors (Alternative Option):
    • Some connectors come with pre-polished fibers, eliminating the need for on-site polishing.
    • Carefully follow the manufacturer’s instructions for terminating the fibers into the pre-polished connectors.
  6. Assembling the Fiber Ends:
    • Align the prepared fiber ends of each cable with their corresponding connectors. Be cautious not to touch the exposed fiber ends with your fingers to avoid contamination.
  7. Epoxy Adhesive (if using regular connectors):
    • For regular connectors, apply a small amount of epoxy or anaerobic adhesive to the connector’s ferrule.
    • Carefully insert the prepared fiber end into the connector, ensuring it is centered and correctly aligned.
  8. Curing (if using epoxy adhesive):
    • If using epoxy adhesive, place the connector with the inserted fiber into a fiber optic curing oven, following the curing time and temperature specified by the epoxy manufacturer.
  9. Testing:
    • After the adhesive has cured (if applicable), perform a visual inspection of the connector to ensure a clean, well-aligned connection.
    • Optionally, use a fiber optic power meter and light source to check for proper light transmission and low signal loss.

By following these steps, you can successfully join two fiber cables. Always handle fiber optic cables with precision and cleanliness to ensure a reliable and high-quality connection. Seek assistance from a professional fiber optic technician if you are uncertain about any step in the process.

BGP (Border Gateway Protocol): Empowering Global Routing for a Connected World!

BGP (Border Gateway Protocol): Empowering Global Routing for a Connected World!

Introduction:

In today’s interconnected world, where communication and data exchange play a vital role in various industries, a reliable and efficient routing infrastructure is essential. Border Gateway Protocol (BGP) stands as the cornerstone of the internet, enabling the seamless transmission of information across networks worldwide. In this blog, we will explore BGP, its significance in routing, and how it helps connect the world.

Understanding BGP:

Border Gateway Protocol, commonly referred to as BGP, is an exterior gateway protocol that facilitates the exchange of routing and reachability information between different autonomous systems (AS) on the internet. AS are individual networks or organizations that have control over their routing policies.

BGP operates at the Internet Layer (Layer 3) of the TCP/IP protocol suite and uses a sophisticated routing algorithm to determine the best path for data packets to reach their destination. It establishes and maintains connections with neighboring routers, exchanging routing information and network reachability updates.

Key Features of BGP:

1. Path Vector Protocol:

BGP utilizes a path vector algorithm, which considers various attributes to determine the optimal path for routing. These attributes include the length of the AS path, the quality of network links, and other policy-related factors.

2. Autonomous System (AS) Border Gateway Protocol:

BGP is designed to operate within and between autonomous systems, providing control over routing policies within individual networks while enabling communication between them. This hierarchical structure allows for scalability and efficient routing on a global scale.

3. Policy-Based Routing:

BGP enables network administrators to implement policies that influence the flow of traffic. This flexibility allows organizations to prioritize certain paths or avoid congested links, ensuring efficient utilization of network resources.

BGP’s Role in Routing the World:

1. Global Network Reachability:

Before the advent of BGP, networks were largely isolated entities with limited connectivity. BGP changed this landscape by introducing a scalable and flexible framework for interconnecting autonomous systems. It allowed disparate networks to exchange routing information, paving the way for seamless global reachability.

2. Interconnecting Autonomous Systems:

BGP serves as the glue that connects various autonomous systems, enabling seamless communication between networks operated by different organizations, Internet Service Providers (ISPs), and content providers. This interconnectedness forms the foundation of the global internet.

3. Dynamic Routing Updates:

continuously monitors the state of networks and dynamically adjusts routing tables in response to changes in network topology, link failures, or new paths becoming available. This adaptability ensures that data packets are always routed along the most optimal and reliable paths.

4. Load Balancing and Traffic Engineering:

With BGP, network administrators can influence traffic flow by implementing policies that distribute the load across multiple network links. This allows for efficient utilization of available bandwidth, avoids congestion, and improves overall network performance.

5. Path Redundancy and Fault Tolerance:

BGP enables the creation of redundant paths between networks, offering fault tolerance and resilience. In the event of a link failure or congestion, BGP automatically reroutes traffic along alternative paths, ensuring continuity of service.

6. Internet Service Provider (ISP) Connectivity:

BGP is essential for ISPs to establish connectivity with each other, exchanging routing information and ensuring that internet traffic is properly routed between different networks. This connectivity forms the backbone of the internet and enables global communication.

Conclusion:

Border Gateway Protocol (BGP) has revolutionized global interconnectivity by transforming the way networks communicate and exchange data. Its dynamic routing, policy-based control, and collaborative framework have paved the way for a seamlessly interconnected world. BGP’s impact can be seen in the exponential growth of the internet, the establishment of reliable connections between autonomous systems, and the efficient utilization of network resources. As we navigate the complexities of an increasingly interconnected world, BGP continues to serve as a foundational pillar, enabling global communication, collaboration, and progress.

What Is The Difference Between Wireless and Wired Networks?

What Is The Difference Between Wireless and Wired Networks?

Both wireless and wired networks have their own advantages and disadvantages. You also have the option to choose a mixed network where you opt for a combination of both:

PARAMETERWIREDWIRELESS
Communication MediumCopper, Fiber etc.Radio-wave frequency
StandardIEEE 802.3802.11 family
Mobility and RoamingLimitedHigher
SecurityHighLower than Wired. Also easy to hack
Speed / BandwidthHigh Speed up to 1 GbpsLower speed up to 50Mbps
DelayLowHigh
ReliabilityHighLower than Wired
Flexibility to changeLess flexible to changesMore flexible configuration
Working principleCSMA/CD, operates by detecting the occurrence of a collision.CSMA/CA , hence reduces possibility of collision be avoiding collision from happening
Interference and Fluctuations vulnerabilityVery LessHigh
Installation activityCumbersome and manpower intensiveLess labor intensive and easy
Installation TimeTakes longer time to performVery less deployment time
Dedicated / Shared ConnectionDedicatedShared
Installation CostHighLow
Maintenance (Upgrade) costHighLow
Related equipmentRouter, Switch , HubWireless Router, Access Point
Benefits* Greater Speed
* Higher noise immunity
* Highly reliable
* Greater Security
* No Hassles of Cable
* Best for mobile devices
* Greater mobility
* Easy installation and management
How To Crimp an RJ45 Connector With a Cat6 LAN Cable?

How To Crimp an RJ45 Connector With a Cat6 LAN Cable?

[youtube https://www.youtube.com/watch?v=4TvPY4XFlgE]

In this video we will show you how to crimp an RJ45 connector with a Cat6 Lan cable. Below, we will also show you a written guide.

How to Crimp an RJ45 connector With a Cat6 LAN Cable

Materials Needed:

  1. Cat6/Cat5 LAN cable
  2. RJ45 connector
  3. Crimping tool
  4. Cable cutter

Step 1: Measure and Cut the Cable

  • Determine the desired length of your Ethernet cable and cut the Cat6 cable to that length. Use a cable cutter or a sharp utility knife to make a clean cut.

Step 2: Strip the Cable Jacket

  • Use a cable stripper or utility knife to strip off about 1.5 inches (3-4 cm) of the outer jacket from the end of the cable. Be careful not to damage the twisted pairs inside the cable.

Step 3: Untwist and Arrange the Wires

  • After stripping the jacket, you will see four twisted pairs of wires. Untwist the wires carefully. Try to keep the twists as close to the cable jacket as possible to maintain optimal performance.
  • Arrange the wires in the following order, from left to right: white-orange, orange, white-green, blue, white-blue, green, white-brown, and brown.

Step 4: Trim and Align the Wires

  • Use a wire cutter or scissors to trim the ends of the wires so that they are all even and aligned. The trimmed wires should be long enough to reach the front of the RJ45 connector.

Step 5: Insert the Wires into the RJ45 Connector

  • Carefully insert the wires into the RJ45 connector in the same order you arranged them. Make sure they go all the way to the front of the connector and stay in the correct order.

Step 6: Check the Wiring Order

  • Double-check that the wires are in the correct order, following the T568B standard for Ethernet connections, which is the most common wiring scheme. The order, from left to right, should be: white-orange, orange, white-green, blue, white-blue, green, white-brown, and brown.

Step 7: Crimp the Connector

  • Insert the RJ45 connector and cable into the appropriate slot on the crimping tool. Make sure the connector’s gold contacts are facing down.
  • Squeeze the crimping tool firmly and evenly to crimp the connector onto the cable. This will secure the wires in place and create a solid connection.

Step 8: Repeat for the Other End

  • If you’re making a patch cable, repeat the above steps to crimp an RJ45 connector onto the other end of the Cat6 cable.

Step 9: Test the Cable (Optional)

  • If you have a cable tester, you can use it to check the continuity and correctness of the wiring in the cable. This step is optional but recommended to ensure a proper connection.

That’s it! You’ve successfully crimped an RJ45 connector onto a Cat6 LAN cable. Repeat the process as needed to create custom-length Ethernet cables for your networking needs.